The airy silk cambric with a light shade of latte and the playful fly-away details of the shelf, like the wings of a butterfly, give a romantic sound to the basic, at first glance, blouse from Burda 9/2019.

If you have never sewed or worn pastel-colored clothes, then it's worth a try!

And we offer to start with a simple and at the same time not quite ordinary blouse from the September collection Burda "Soft Power", which became the theme of the month!
- Special offer

- 1
- 2
- 3
- 4
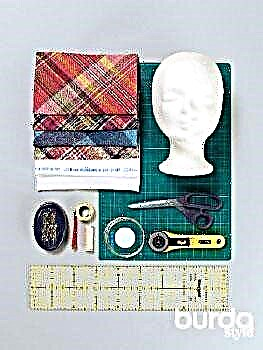
You will need:
✂ Silk batiste 1.8 m wide 140 cm;

Photos and cambric (composition: 50% cotton, 50% silk): @ tkani.andreana
✂ Tailor scissors for silk and fine fabrics;
✂ Tailor's chalk;
✂ Ruler for marking allowances;
✂ Needle and thread for sewing
Pattern changes
The absence of a zipper, so instead of two parts, the back is cut with a fold, and the width and depth of the neckline are changed.


To do this, on the paper parts of the back, outer and inner parts of the shelf, it is necessary to reduce the shoulder length to 9 cm and increase the cutout depth by 1.5–2.5 cm. .
Step 1. Cutting

Place the details of the paper pattern on the fabric, pin and cut with allowances for the seams (for shoulder sections and neckline 1 cm, for other sections, for hemming the bottom of the blouse and sleeves - 1.5 cm):
21 Front outer part with 1x fold
22 Internal gear part with 1x fold
23 Backrest part with 1x fold
24 Sleeve 2x
Two ties of 45 cm length and 4 cm width, including allowances, draw directly on the fabric and cut.
Slanting inlay for processing neckline neckline.
Step 2


On the external and internal parts of the front, sweep and grind breast tucks.

Iron tuck depths down.
How to make perfect tucks without the hassle
Step 3
Cut out the neckline of the backrest with an oblique inlay.
How to sew an oblique edging: 3 ways
Step 4

Place the outer front part on the wrong side of the inner front part.

Often chop or sweep parts along the neckline of the front end.

Sew a stitch at the allowance distance.


Iron the seam and cut to 0.5-0.7 cm.

Iron the allowance on the inside of the front and stitch close to the seam.

Unscrew the inner part of the front and sweep the neckline of the front from the front of the outer part of the front of the blouse.

Iron on the wrong side.
Step 5


On the outer front part, allowances for straight upper cuts to be swept and ironed on the wrong side twice, and then stitched to the edge.


Treat the lateral and lower sections of the outer part of the front with a role seam on the overlock.
Step 6
Fold the outer part of the front with the back detail to face each other.


Combine and sweep the shoulder sections.

And then grind.


To iron a seam allowance on a shelf.


Unscrew the shoulder cut allowance of the inner part of the front inwards and hem the blind seam manually to the shoulder seam.
Step 7


On the inside of the front and back, sew side sections with a French seam.
Iron the seam allowances on the back.
Sewing on paper: how to make a narrow French seam and a narrow hem
Step 8


Unscrew the blouse on the front side and notice the outer part of the front to the inner part of the front along the sections of the armholes.
Next, treat the part as a single layer.
Step 9

Fill the seams of the sleeves: chop or sweep and grind with a French seam.

Iron the seam allowances on the back.
Step 10


Sleeves are often thrust into armholes and stitched.
Neaten the seams of each seam together and iron on the sleeve.
3 ways to handle set-up sleeve allowances
Step 11


Mark and iron the allowances for hemming the bottom of the blouse and sleeves twice, and then grind.
Step 12

Fold the strings in half along the front side inwards and grind.

Iron the seams.

Cut the seam allowances to a width of approx. 5 mm.

To turn out ties, to iron.

Grind the ends of the ties from the wrong side of the outer part to the marking of the allowances.
Tie the open ends of the ties to a knot.
Details

neckline

french seams, hem
Wing Blouse


More interesting articles, master classes and patterns are waiting for you on the Themes of the Month page!
The author of the master class: Julia Dekanova; photo: Julia and Andrey Dekanov; fabric photo: @ tkani.andreana