In the patterns of products of a direct silhouette for better fit of the model according to the figure, relief seams are often provided in which convenient pockets are usually hidden.
As a rule, in such patterns, the shelf consists of two parts - the shelf and the side of the shelf.
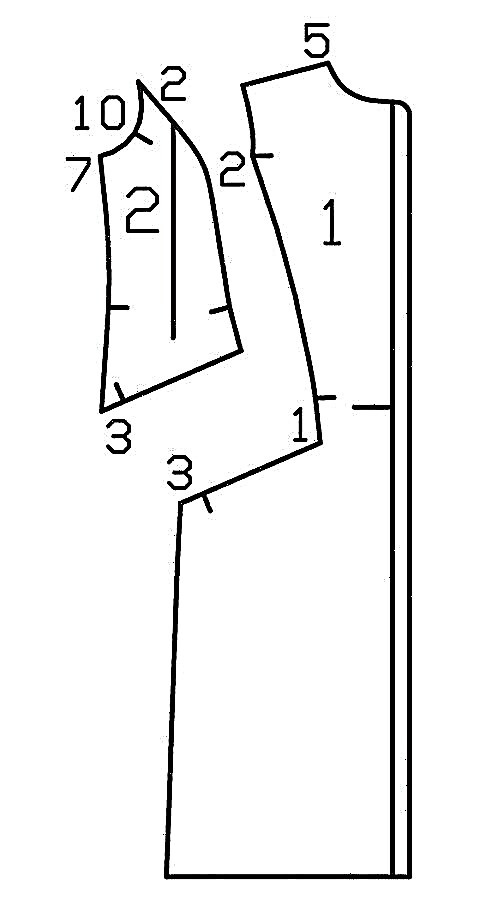
Actually, this side part of the main part forms a relief seam and allows you to place pockets with a leaf in the product.
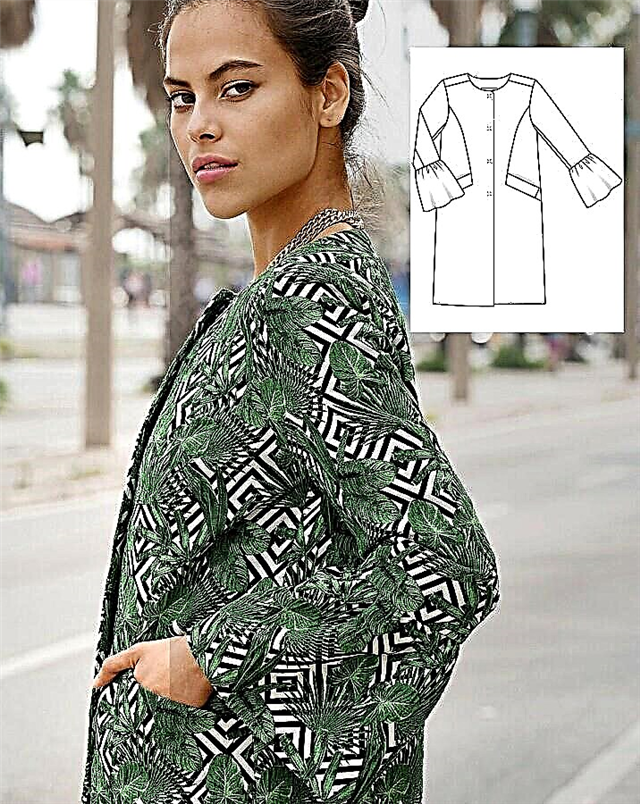
Using the example of a summer straight jacket made of jacquard from Burda 3/2019, let us consider how to properly execute pockets with a leaflet in the raised seams of the shelf:
- Special offer

- 1
- 2
- 3
- 4
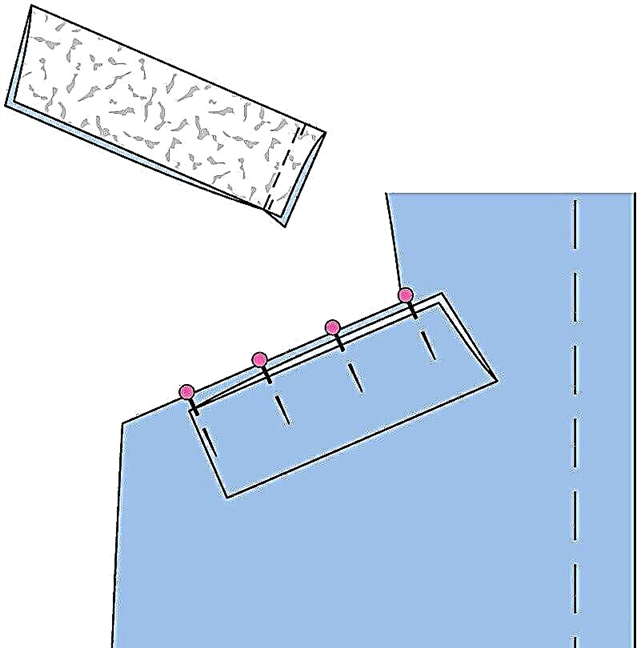
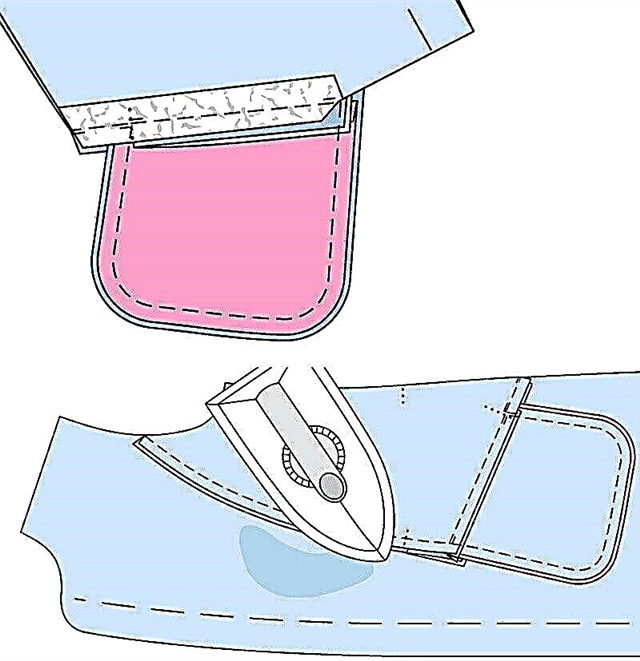
Step 1. Stitch burlap from the main fabric
Pin the sacking of each pocket from the main fabric to the side of the shelf along the burlap section of the burlap (= lower cross section) with the front side to the front side and grind from the relief section to the cross mark.
Bind at the beginning and end of the line. Iron seam allowances.
Types of pockets in clothes
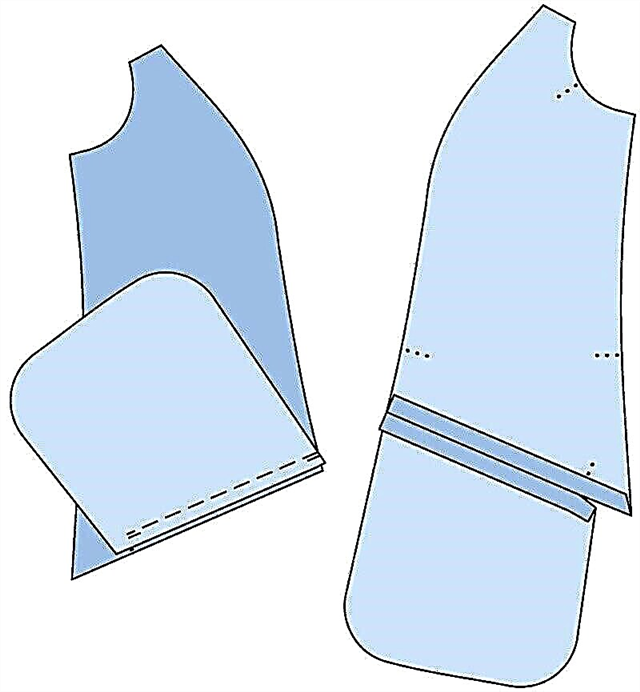
Step 2. Leaflets
Fold each leaflet along the fold line with the front side inward.
Sew side slices (= slices without a reference mark).
Cut the seam allowances close to the stitch.
Turn out a leaflet, iron it.
Pin the open longitudinal sections of the leaf together to the shelf along the section of the grind of the leaf, aligning the cleanly turned end of the leaf with a cross mark.
Step 3. Stitch leaves and burlap from lining fabric.
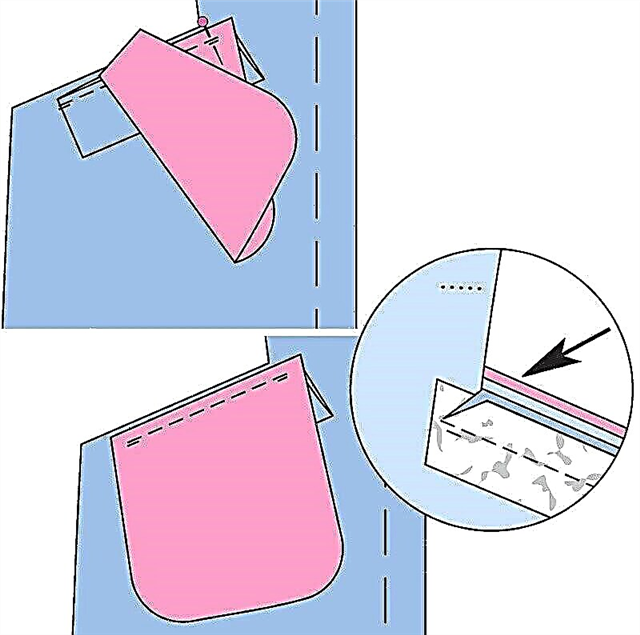
Pin each burlap pocket from the lining fabric over the leaflet along the entrance to the shelf pocket with the front side to the front side.
Grind the burlap of the pocket and the leaflet, but do not fasten the allowances of the leaflet and burlap at the front end of the pocket.
Bind at the beginning and end of the line.
Cut the allowances of the shelf in the corner close to the end of the line (arrow). In this case, do not damage the leaf and burlap pockets.
Unscrew the burlap pocket from the lining fabric on the wrong side, unscrew the leaf up. Iron.
Step 4. Longitudinal relief seams of shelves
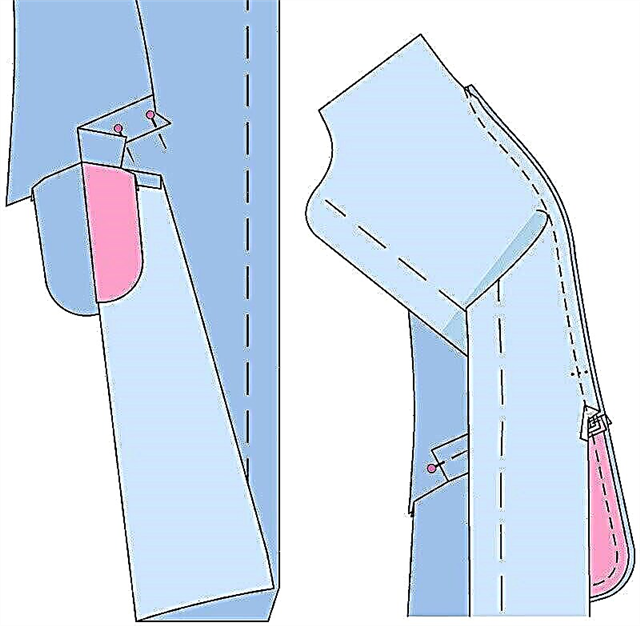
Place the shelves with leaflets on the sides of the shelves, combining the seams of the ground of burlap from the main and lining fabrics.
Pin the leaves.
Fold the shelves so that they lie on the sides of the shelves with the front side facing the front side.
Chip the embossed sections, then chop the burlap pockets. Get off.
Sewing School: Pocket Processing
Step 5. Cross seams of shelves
Then turn the shelves up, make short transverse seams of the shelves from the side sections to the transverse marks.
Bind at the beginning and end of the stitches.
Iron the allowances of the longitudinal embossed seams of the shelves onto the shelves, the allowance of the transverse seams - down.
Sew the cleanly turned lateral ends of the leaflet with hand, hidden stitches to the lateral parts of the shelves.
Basic Hand Stitches
Source, photo and illustration: Burda 3/2019