A wonderful cotton bag with a decorative stitch is perfect for storing accessories for crafts or will act as a cosmetic bag!
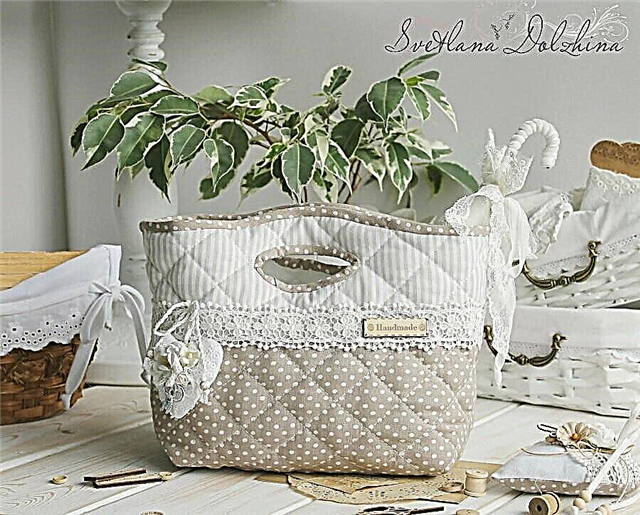
I present to you a workshop on sewing bags made of fabric. It is perfect for storing lace, ribbons, knitting as an organizer! It can also be used for cosmetics and all kinds of women's bottles and bottles, which my daughter does. She had been sewing this with a makeup bag for a long time, but for herself only now her hands reached it. It is perfectly erased (it has already been tried more than once), after washing it does not lose its shape.
How to make a round bag from a rope with your own hands
For work, we need:
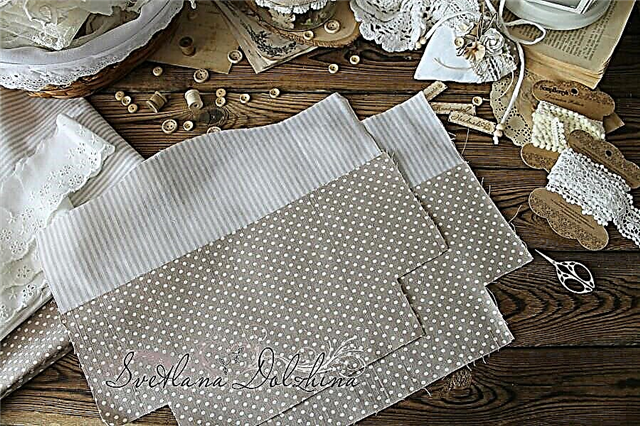
- two kinds of cotton
- synthetic winterizer
- threads
- ruler
- disappearing marker
- lace
- scissors
Step 1


We print out the template and cut it out.
Step 2

We cut out the details of the bag from two types of cotton (for convenience, you can cut the pattern), leave 0.5 cm from each edge for allowances.
Step 3
We sew the bag parts together on a typewriter, stepping back from the edge of 0.5 cm
DIY velvet belt bag
Step 4

We cut out the internal details of the bag (I took white cotton), we make them 1 cm larger on all sides.
Step 5

Between the parts we make a layer of synthetic winterizer (I have a synthetic winterizer with a density of 200), we pinch all the layers with needles so that the details do not shift when we bast.
Step 6

We sketch out the details of the bag, first along the edge, then sew every 4-5 cm. This will help to gently stitch in the future :)
DIY sweater bag: a simple workshop
Step 7

Now you need to use the disappearing marker to make markup for the line. I made a diagonal and then took a step to the width of the ruler, so as not to measure the distance each time. First we draw in one direction, then in the other.
Step 8

This markup turned out like this (I drew a remnant, a habit :) it’s convenient, while scribbling, everything will disappear)
Step 9

Such a stitch should work out :)
Step 10

Now you can trim the excess around the edges.
Step 11

Immediately at this stage, we outline the pens with a pencil and make a line, stepping a couple of millimeters from the edge from the outside. Cut a hole along the line of the pencil, the line will turn out just along the edge of the hole.
Step 12

We try on lace or sewing with which we will decorate the bag.
Step 13

We sew the lace by hand with a hidden seam, I decided to decorate it with Leomammy Handmade wooden tag, I was looking for small tags for a long time to suit any work. In general, these are my favorites now, and you will often see them in my master classes and works! The tag is easy to sew through the holes along the edges.
Half an hour napkin bag: master class
Step 14

Using the needles, we fix the bottom of the bag and flash it on a typewriter (you can bast it to make it more convenient to flash).
Step 15

We cut out the stitching (the stitching is cut at an angle of 45 degrees, it is easily stretched and takes a rounded shape due to the direction of the threads) 2.5 * 20 cm in size to process the seam.
Step 16

Tuck the edges and sew, closing our seam, you can sew on a fabric tag.
Step 17

Now we cut off the side seams, be sure to check that the lace matches on both parts of the bag, in this place we fix additional needles and sew on a typewriter.
Simple leather laptop bag: master class
Step 18

We cut out a stitching of the same size 2.5 * 20 cm (then we cut off the excess, you can buy a ready-made cotton tape obliquely, it will be with a folded edge, I didn’t have it at home) and we sew a seam for it, first we sew it on one side seam.
The article will continue after the advertisement.Step 19

We tuck the seam and mark it to make it more convenient to flash it on a typewriter. Firmware :)
Step 20

Now it’s the turn of the side seams of the bottom of the bag. We connect and cleave with needles.
Step 21

We look so that the seam of the bottom and the side seam coincides, but looks in different directions.If the seams are straightened in one direction, the needle may break during stitching.
Large sports bag without a pattern: a master class
Step 22

We also process the side seams of the bottom by turning.
Step 23

Now we will process the upper edge of the bag. We cut out from the fabric (I took the fabric that I used for the bottom of the bag) a trim of 2.5 * 65 cm.
Step 24

When we sew the stitching, we pull it slightly so that it then fits tightly and does not wrinkle. It is very difficult to guess the exact size, so I don’t stitch it, but first I sew it on the product, only after that I sew the ends of the grind. They should be at an angle of 45 degrees and different (on one side an acute angle, on the other a blunt one, as in the photo. I specially photographed separately to make it clear).
Step 25

We sew a hem on the front side of the bag, the front sides will be inward.
Step 26

Then we turn the second edge and sew it with a blind seam manually.
Step 27

We also handle the handles of our bag.
Step 28

You need to connect the ends of the facing by cutting at an angle of 45 degrees and sew, then we turn it off and hem it in a blind seam.
Large luggage shopper: master class
Step 29

In the same way we will process the second handle.
We admire the finished result!


I wish you creative success! I hope my master class is useful to you!
Strange but cute: 10 unusual bags to wear
About the author

Hello, my name is Svetlana and I live in Tyumen. Since childhood, she loved to sew, first she sewed toys on a mug, and then she began to sew clothes. For more than 20 years, sewed clothes to order. Now my main hobby and work is scrapbooking, I realize my childhood dream of being a designer) Sewing, of course, I continue, but now mainly for myself and my loved ones. I like to sew organizers and all sorts of things that help to decorate my house.
My store //www.livemaster.ru/scrapmelange?view=profile
Instagram //www.instagram.com/svetlanadolzhina/
Vkontakte //vk.com/handmade.melange
A blog in which you will find all my master classes and works in full // dolzhina.blogspot.com/